There are times when it's useful to view financial information – such as transactions or records – in a list format. That's where the Lists feature in Sage Intacct comes in, enabling you to sort, filter, and even create new lists to view only the items that are most important to you. Let's take a closer look at how to create customized filtered list views in Sage Intacct.
How to Filter Lists
There are two ways to filter lists in Sage Intacct. Here's a look at both.
Filter Based on a Specific Value
Use Advanced Filters to Apply Standard Operators to Columns
Filter Based on a Specific Value
- In the text field above the column that contains the value, enter the first part of the value. For example, if the value begins with “San” type San to include records with a value for this column of San Jose, San Francisco, Santa Fe, and so on.
- Enter % and then a portion of the value to view all items containing that portion of the value. For example, if you wanted to search for all June summaries, you would enter %June in the field at the top of the Summary column.
- Click Go beside the field and the system will display the line items that match the text you entered.
Use Advanced Filters to Apply Standard Operators to Columns
- Go to the list screen that you’d like to apply to filter
- Click Advanced filters
- Select the appropriate Column
- Under Operator, select a standard operator (equals, less than, greater than, etc.)
- Under Value, enter a specific value for the column (one per filter row)
- Add your criteria for a specific list view
- Click Apply in the Advanced Filters box
Displaying Your Lists Through Custom Views
In Sage Intacct, a View refers to the way a list is arranged, filtered, and sorted. While the software provides standard views for displaying list items, you also have the flexibility to create your own custom views. Here’s are a few ways you can do that.
Filter for Recent Records
Filter for Recent Records
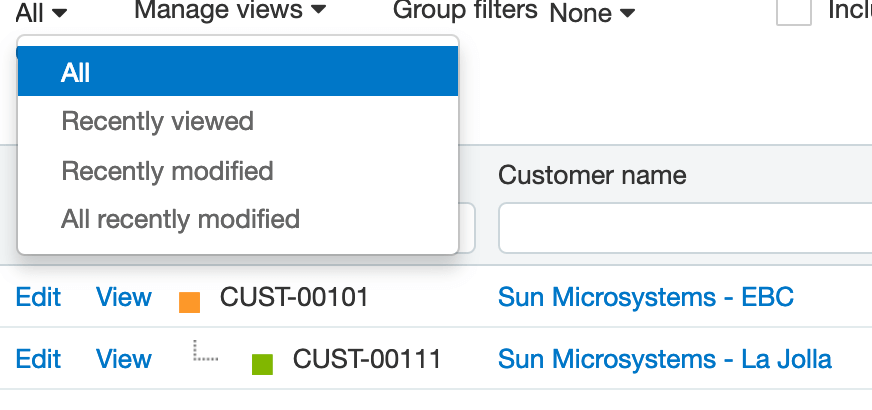
- Click the down arrow near the View menu
- Click Recently Viewed, Recently Modified, or All Recently Modified
- Return to a view of all records by clicking the down arrow again and selecting All
Add a Custom View (Based on an Existing View)
Add a New Custom View
Edit a Custom View
Delete a Custom View
- Under View, select the view you want to use as a base
- Under Manage views, click Save View As
- In View Name, type a unique name
- Click Save
Add a New Custom View
- Under Manage views, click Create New View
- Follow the wizard steps to set up the view
Edit a Custom View
- Under View, select the custom view
- Under Manage views, click Edit
Delete a Custom View
- Go to Customization Services
- Click Custom Views
- Locate the row with the view you want to delete and click Delete
Exporting and Printing Your Lists
Need to print a list of a standard or custom view? Looking to export a list to an external application file like Word, PDF, CSV, or Excel? Sage Intacct makes it easy.
To Export a List:
Click Export at the top of the screen and then Select the file type.
To Print a List:
In the list screen, click the Export button or CSV link, then Print the file using the external application’s Print feature.
To Export a List:
Click Export at the top of the screen and then Select the file type.
To Print a List:
In the list screen, click the Export button or CSV link, then Print the file using the external application’s Print feature.
|
Guest Article by ACI Consulting
This article is a guest blog post provided by ACI Consulting. Proudly serving Sage software clients for over 20 years, ACI Consulting provides Intacct Consulting in Orange County and throughout Southern California. |


