Sage 100 comes with lots of standard, built-in reports right out of the box. But sometimes, a standard report doesn’t deliver the custom fit you need for your particular business or situation. That’s where the Crystal Reports Designer comes in, allowing you to build tailor-fit reports using Sage 100 data tables. Then once it’s built, here’s how to add that custom Crystal Report to the Sage 100 menu for quick and easy access.
Adding a Custom Crystal Report to Sage 100 Menu
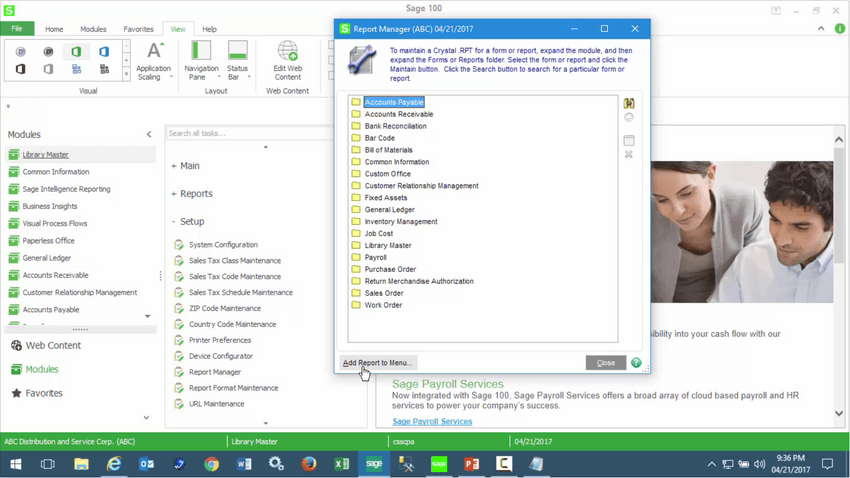
1. Open Library Master, Setup menu, Report Manager
2. Click Add Report to Menu to launch the Menu Wizard
(Note: To be able to access the Add Report to Menu option, your user login will need the "Allow User to Access Menu Wizard" check box option enabled in Role Maintenance).
3. On the Menu Wizard, click Next
4. For Module, select the module application to which the custom report will be added
5. For Path and File Name, browse to the custom Crystal Report file
IMPORTANT: The report file name must end with CUSTOM.RPT and be 30 characters or less (Example: MyAwesomeReport_custom.rpt)
6. For Report Name, enter the name you want displayed on the menu for this report
7. Click Next
8. Select the applicable user Role(s) that will be allowed to access this report
9. Click Finish
10. Take notice in the Custom Reports Menu of the applicable module (that you selected in Step 4), a new option with your Report Name (entered in Step 6) now displays and can be selected.
IMPORTANT: The added custom Crystal Report should get copied to the "..\MAS90\Reports" folder on the server where Sage 100 is installed. If it does not exist there, copy it there.
Note: Sage Customer Support does not provide assistance in creating or troubleshooting custom Crystal Reports or third-party products. If you need help, contact your Sage Reseller.
FAQ: What Versions of Crystal Reports are Supported with Sage 100?
What is Crystal Reports for Sage?
|
SAP Crystal Reports is a third-party reporting tool that’s bundled with Sage 100 (and as the name suggests, is owned by SAP which acquired the product in 2007). In addition to the loads of standard, pre-built Crystal Reports provided “out of the box” with Sage 100, this powerful reporting platform also allows you to create presentation-quality reports with tons of features and flexibility.
But just like anything that’s powerful and feature-packed, designing your own custom reports does require some degree of skill, training, and familiarity with the underlying Sage 100 database structure. However, using the pre-built Crystal Reports is as easy as just choosing an available report from the Sage 100 menu. |


