The latest software release of Sage 100 Contractor 2021 (Version 23.2) is all about YOU – that is to say, current Sage Construction customers who have submitted their product enhancement ideas through the Sage Ideas Website. Sage 100 Contractor 23.2 incorporates some of the top-ranked suggestions – covering almost every area of the software – that we’ll take a closer look at in this article.
General Ledger Enhancements
In General Ledger, the GL Setup window (menu item 1-8) features a new 'Set posting period from transaction date' option that you can select if you want to use the transaction date to set the default posting period for transactions.
When you select this option, Sage 100 Contractor automates the period based on the date on the entry.
When you select this option, Sage 100 Contractor automates the period based on the date on the entry.
In the 1-3 Journal Transactions window, when you void an A/P payment from a previous period, you can now choose to:
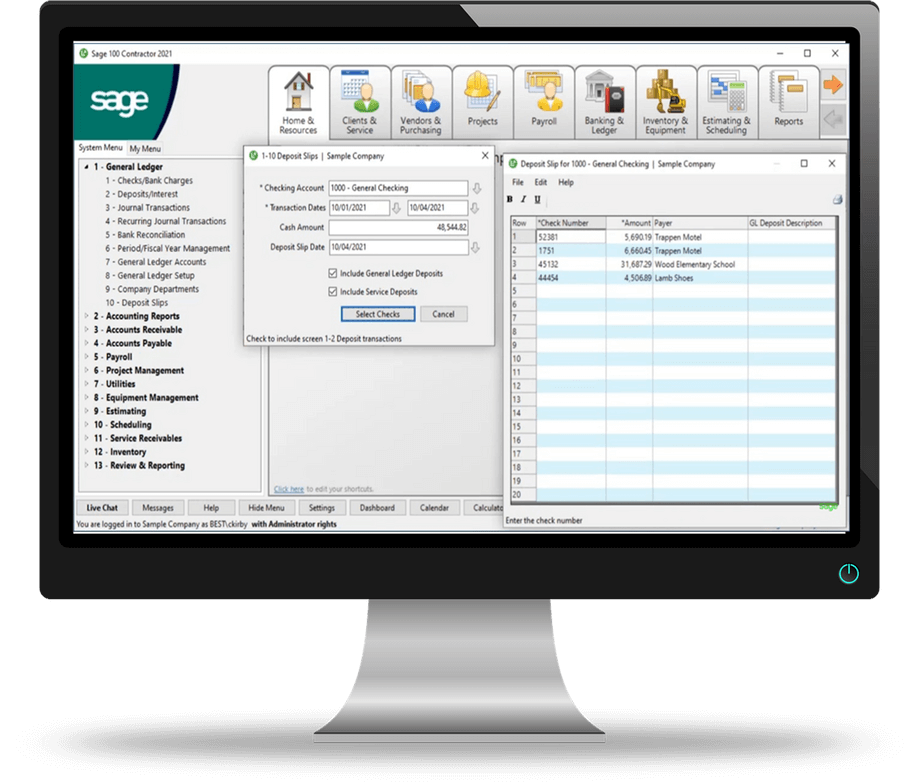
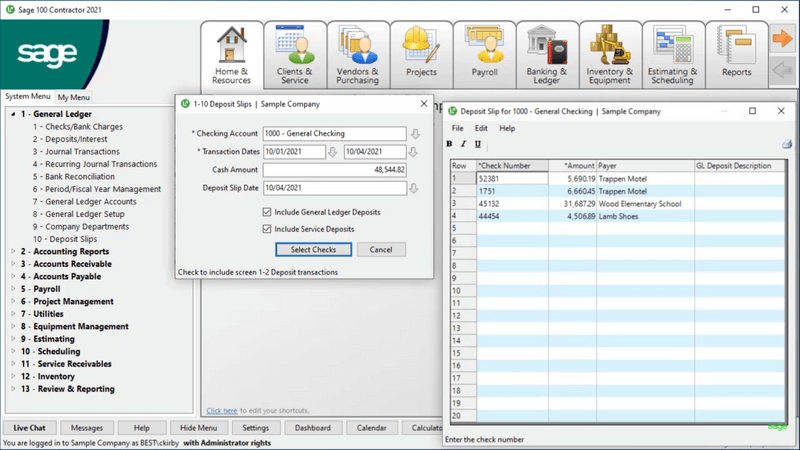
When it comes to Deposit Slips (menu 1-10), a new window allows you to print a detailed list of the cash and checks that make up a deposit, so that you can take this list to the bank when you make a physical deposit.
Follow these steps to print deposit slips:
1. Open the 1-10 Deposit Slips window.
2. In the Checking Account box, enter a checking account number in the Cash Accounts range.
3. In the Transaction Dates boxes, enter the range of dates on which you received the checks that you are taking to the bank.
4. In the Cash Amount box, enter the total amount of bills and coins that you are depositing.
5. In the Deposit Slip Date box, enter the date that you are making the deposit.
6. If you want to include general deposits (unrelated to receivables), select the Include 1-2 Deposits options.
7. If you have a license for Service Receivables and want to include customer deposits that were entered with service work orders and quotes, select the Include Service Deposits option.
8. Click [Select Checks]. Sage 100 Contractor displays the Deposit Slip selection grid, listing the checks that match your selection criteria.
9. In the selection grid, you can:
NOTE: these changes impact the deposit slip only. They are not saved to the Sage database.
10. When you are satisfied with the list of check deposits, click File > Print.
11. In the Report Criteria box of the 1-10 Report Printing window that appears, select 21-Deposit slip, and then click File > Print to print the deposit slip.
- Void the payment, which affects the original posting period.
- Reverse the payment in the current period, keeping intact your financial data from earlier periods, which you may have already reconciled and closed.
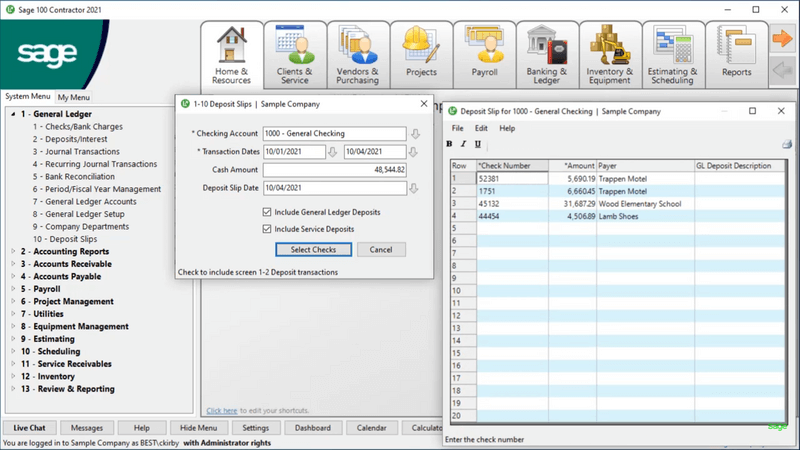
When it comes to Deposit Slips (menu 1-10), a new window allows you to print a detailed list of the cash and checks that make up a deposit, so that you can take this list to the bank when you make a physical deposit.
Follow these steps to print deposit slips:
1. Open the 1-10 Deposit Slips window.
2. In the Checking Account box, enter a checking account number in the Cash Accounts range.
3. In the Transaction Dates boxes, enter the range of dates on which you received the checks that you are taking to the bank.
4. In the Cash Amount box, enter the total amount of bills and coins that you are depositing.
5. In the Deposit Slip Date box, enter the date that you are making the deposit.
6. If you want to include general deposits (unrelated to receivables), select the Include 1-2 Deposits options.
7. If you have a license for Service Receivables and want to include customer deposits that were entered with service work orders and quotes, select the Include Service Deposits option.
8. Click [Select Checks]. Sage 100 Contractor displays the Deposit Slip selection grid, listing the checks that match your selection criteria.
9. In the selection grid, you can:
- Sort the checks to in the order that you want to list them on the deposit slip.
- Add, edit, or delete rows in the grid.
NOTE: these changes impact the deposit slip only. They are not saved to the Sage database.
10. When you are satisfied with the list of check deposits, click File > Print.
11. In the Report Criteria box of the 1-10 Report Printing window that appears, select 21-Deposit slip, and then click File > Print to print the deposit slip.
Accounts Receivable and Accounts Payable
In Accounts Receivable under 3-2 Invoices and Credits, you can now open an invoice that you previously entered and edit the line description.
In the 4-4 Vendors setup on the other defaults tab, you can assign a preferred payment method. Sage 100 Contractor displays the payment method in the 4-3-2 Pay Vendors window and uses it to verify the selected payment method.
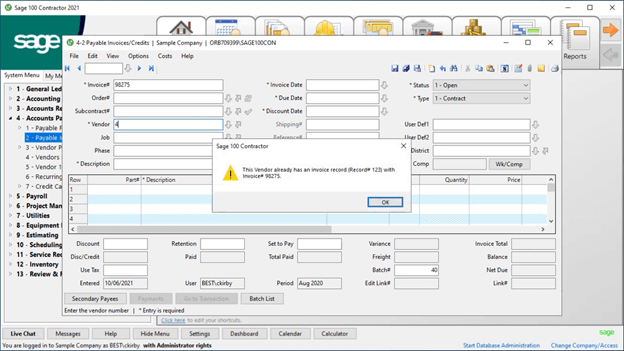
In 4-2 Payable Invoices/Credits, a warning message now displays earlier in the process when you enter a duplicate invoice for a vendor that’s set to disallow duplicate invoices. Sage 100 Contractor now warns you as soon as you enter both the vendor number and a duplicate invoice number.
Payable Enhancements
In the 5-2-1 Employees window, a new Hire History button displays a complete hire history - including multiple Date Hired and Date Inactive dates - for employees who are periodically laid off and then rehired. This information updates when any changes are made to the hire date or inactive fields.
If you use direct deposit for employees, you’ll be happy to learn that Sage 100 Contractor 2021 now provides a way to include custom email messages.
When you select a direct deposit report in 5-2-4 Report Printing, select the Direct deposit email settings option from the Options menu. Then, in the Direct Deposit Email Settings window that appears, enter a message with any information you want—for example, advice about opening the attachment, alerts about changes to benefit plans, and so on. Contact your Sage 100 Contractor Partner for helping setting up or using this new feature.
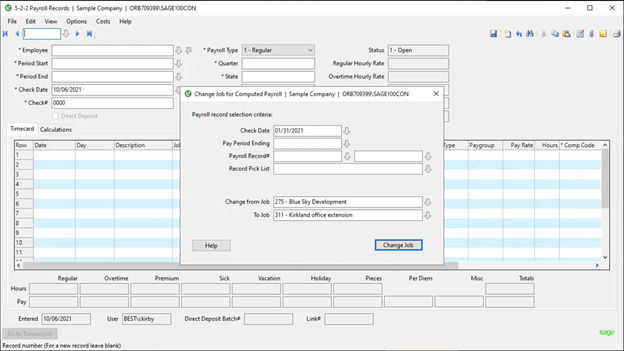
Lastly, you can now edit/modify the job for timecard lines in computed payroll. Use the new Change Job for Computed Payroll option that has been added to the Options menu in 5-2-2 Payroll Records. This new feature comes in handy in a situation, for example, where you haven’t fully setup a job yet in Sage 100 Contractor, but there are site preparation costs for which you need to pay employees. You may setup a temporary job as a placeholder to pay employees - then later when the actual job is setup but maybe has a different job number, you can now easily transfer the costs from the temporary job to the actual job.
Estimating Updates
In Estimating under 9-5 Takeoffs, you can now have the following options:
- Customize and save the column widths in the Recaps grid, so you don't have to readjust the columns whenever you return to the Recaps tab.
- Select a new Lock Edit check box when you want to prevent unauthorized users from editing or deleting the details of a takeoff, while preserving the ability to view and export the takeoff.
- On the Options menu, you can now select a Do Not Calculate Assembly Cost option. This option enables you to save takeoffs that have assemblies with a negative cost.
Other Notable Enhancements
Here’s a quick recap of other notable improvements and new features across other areas of Sage 100 Contractor:
- In the 6-11-1 Requests for Proposal window, you can use a new Create Subcontract button to create a new subcontract using the information from a selected RFP.
- You can now add shortcuts to the Sage 100 Contractor desktop for any queries you create for quicker and easier access next time you run it.
- In Service Receivables, you can create a client alert that displays when you enter that client on a service order in 11-2 Work Orders/Invoices/Credits.
- Expanded content and more in-depth tips included in the built-in Help system that answers many of the most frequently-asked questions such as how to select a range of check numbers or how to track P/Os by amount rather than quantity.
Important Note About Sage Estimating
Sage 100 Contractor version 23.2 is not compatible with Sage Estimating version 20.1 and earlier. If you integrate Sage 100 Contractor with Sage Estimating, do not install Sage 100 Contractor version 23.2 until you install Sage Estimating version 21.1. Be sure to contact your Sage Partner for assistance.
Sage 100 Contractor version 23.2 is not compatible with Sage Estimating version 20.1 and earlier. If you integrate Sage 100 Contractor with Sage Estimating, do not install Sage 100 Contractor version 23.2 until you install Sage Estimating version 21.1. Be sure to contact your Sage Partner for assistance.
