The Custom Buttons Toolbar in Sage 100 allows you to create, add, or delete buttons to fit your needs. You can create buttons for the tasks you use most frequently or even launch external programs such as Word, Excel, or Outlook. In this Sage 100 tip, you'll learn the steps to completely customize The Custom Button toolbar with as many buttons and program as you like.
Adding Buttons to the Sage 100 Custom Buttons Toolbar
1. Use any of the following methods to add a button:
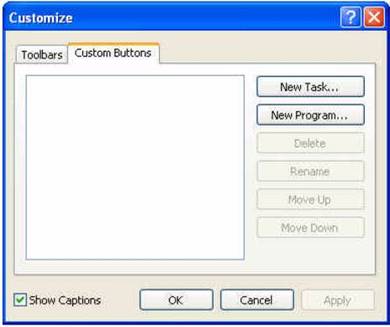
2. On the Customize Custom Buttons tab, click New Task to add a button for a task.
- Select View menu > Toolbars > Customize
- Right-click any toolbar, click Customize
- Right-click the Custom Buttons toolbar, and select Add > Task or Add > Program and proceed to step 3 if you are adding a task or step 4 if you are adding a program
2. On the Customize Custom Buttons tab, click New Task to add a button for a task.
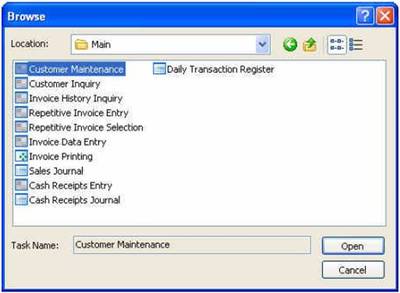
3. In the Browse window, locate the task to add and click Open.
4. To add an external program or desktop shortcut, in the Customize window, click New Program.
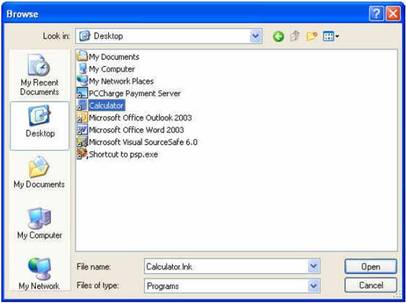
5. In the Browse window, locate the program to add and click open.
5. In the Browse window, locate the program to add and click open.
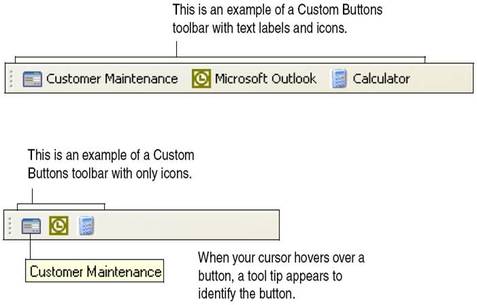
6. To provide more space on your Custom Buttons toolbar, in the Customize window, clear the Show Captions check box to hide the text labels and display only icons for the buttons you added.
7. In the Customize window, click OK. The task and external program are added to the Custom Buttons toolbar.
7. In the Customize window, click OK. The task and external program are added to the Custom Buttons toolbar.
To Delete Buttons or Rename Buttons
1. Right-click the button.
2. Click Rename/Delete
2. Click Rename/Delete
