Visual Process Flows were first introduced back in Sage 300 ERP Version 2012. This popular feature helps Sage 300 ERP customers navigate the system quickly and efficiently while helping them perform daily tasks.
In this article we'll go over how to add your own custom graphics to the Visual Process Flows - that way you can customize these flows to match your unique, company-specific processes and operational procedures.
In this article we'll go over how to add your own custom graphics to the Visual Process Flows - that way you can customize these flows to match your unique, company-specific processes and operational procedures.
Getting Started ...
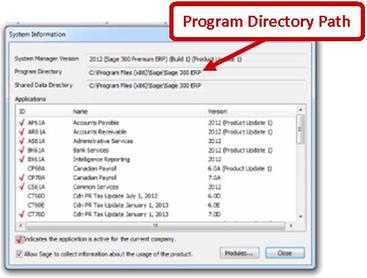
In order to get started adding custom graphics to Visual Process Flows, launch Sage 300 ERP from your Window’s Start Menu, head over to the Help menu, and select System Information. Take note of the Program Directory path.
Step 1: Access the Program Directory
Open Windows Explorer and browse over to the Program Directory.
Step 2: Open the Main Folder
Once you found the Program Directory open the following folders to access the Sage 300 ERP Visual Process Flows main graphics folder.
Runtime > vpf > FlowCharting > xtec > Sage_Libraries > Sage_Basic > Logos > Main
Runtime > vpf > FlowCharting > xtec > Sage_Libraries > Sage_Basic > Logos > Main
Step 3: Add Custom Graphics
Now copy and paste your custom graphics into the main folder.
Step 4: Back Up list.txt
Next, back up the List.txt file and open the file in a text editor such as Notepad:
{"files":[{"name":"logo_1.jpg"}]}
{"files":[{"name":"logo_1.jpg"}]}
Step 5: Modify list.txt
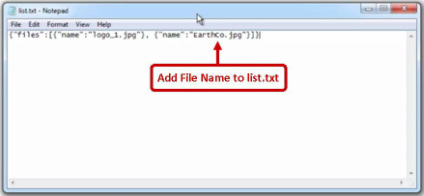
Add your custom graphic’s file name to this file:
{"files":[{"name":"logo_1.jpg"}, {"name":"yourlogo.jpg"}]}
{"files":[{"name":"logo_1.jpg"}, {"name":"yourlogo.jpg"}]}
Save the file.
Step 6: Edit Sage 300 Visual Process Flows
To begin editing process flows with your newly added custom graphics, open the Visual Process Flow module in Sage 300, select the process flow you wish to modify, and then right-click Edit.
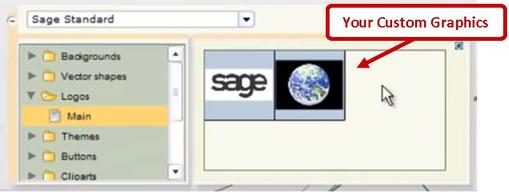
There you will see that the graphic has been added!
There you will see that the graphic has been added!
And that’s all there is to it! Now you know how to add your own graphics and logos to further customize your Sage 300 ERP Visual Process Flows.
Related Articles
Changing Company Screen Colors in Sage 300
Sage 300: How to Void or Refund a Credit Card Payment
Sage 300: How to Process Credit Card Payments
Like This Article?
Please feel free to share it with your friends and colleagues!
Changing Company Screen Colors in Sage 300
Sage 300: How to Void or Refund a Credit Card Payment
Sage 300: How to Process Credit Card Payments
Like This Article?
Please feel free to share it with your friends and colleagues!


