Branding is important for every company, regardless of industry or size. Placing your company's fonts, logo, and colors on every piece of collateral signifies a strong brand and improves professionalism. Its easy to specify the fonts, style, and data elements to print on the header and footer sections of standard reports using Report Format Maintenance in Sage 100. You can also define the font and style for the body of the report, and add images to the header and background of the standard report.
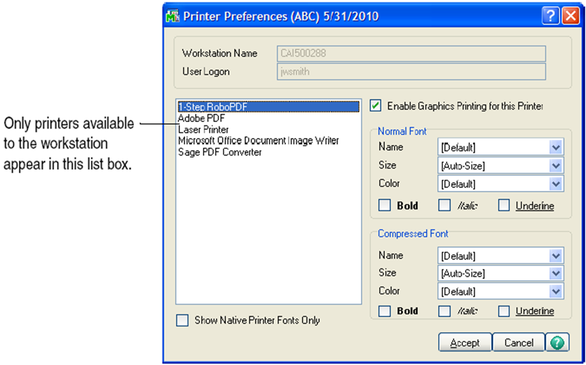
Sage 100 allows you to define one report format per company code and a report format is not specific to a user logon, workstation ID, or to the report. The only exception to this rule is the ability to override the font in the body of the report in the Printer Preferences window. In this case, the override is specific to workstation ID. Here are the steps:
See Also: How to Add Custom Crystal Reports to Sage 100 Menu
To Define a Sage 100 Report Format in the Job Cost, Material Requirements Planning, Payroll, or Work Order Module
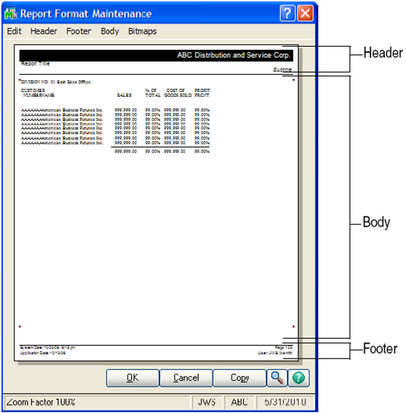
1. Select Library Master Setup menu > Report Format Maintenance. Every report is divided into three sections: Header, Body, and Footer. By default, the header and footer use Arial 12 font and the body uses a variable size Times New Roman font.
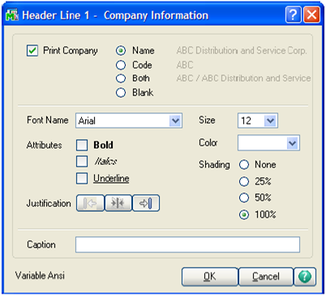
2. In the Sage 100 Report Format Maintenance window, select Header > Company, Report Title, or Subtitles and select settings in each window for the header. The following is an example of the Company Information window. Access the additional windows from the Report Format Maintenance Header menu to select settings for the report header.
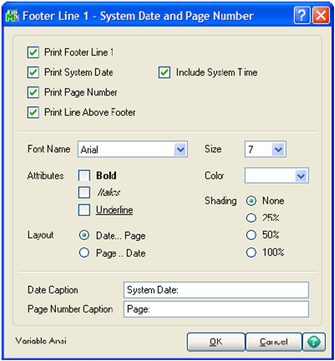
3. Select Footer > Sys Date and Page or App Date and User, and select settings in each window for the footer. The following is an example of the Sage 100 System Date and Page Number window.
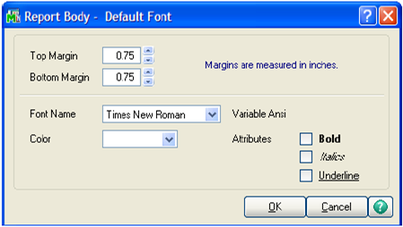
4. Select Body > Font to define font, size, and style settings for the body of the report.
5. Select Bitmaps > Header or Background to add a bitmap image. Bitmaps can be printed in the report header area and in the report background area.
6. In the Report Format Maintenance window, click OK to save your report settings.
7. Select Library Master Setup menu > Printer Preferences.
8. In the Sage 100 ERP Printer Preferences window, select the Enable Graphics Printing for this Printer check box to print reports according to the format defined in Report Format Maintenance. The Use Graphic Report Format check box must also be selected on the User Maintenance Preferences tab.
9. In the Printer Preferences window, define the appropriate settings at the Normal Font and Compressed Font Fields for the report body.
10. Click accept to print reports for the selected printer in the printer list box according to the format defined in Report Format Maintenance.
Need Sage 100 Support or Training?
Like this Article? Feel free to share with your friends and colleagues on Twitter and Facebook!
